
I am not an expert, so take all information and instructions on this page with a pinch of salt. It is quite possible that they will harm you, your wallet, your car, or all three. If in any doubt at all, take your car to the professionals. You have been warned.
The notes below refer to a 1998 EU model E38, but may be
relevant to other BMW series/models of similar age. Note however, that also
there are differences, e.g. later E38 models have a different fan controller
using PWM (pulse width modulation), and these have no fan resistors at all.
If your auxiliary fan lost one or both of its slow speeds,
but is OK on the highest speed, you have to replace one or both of the resistors
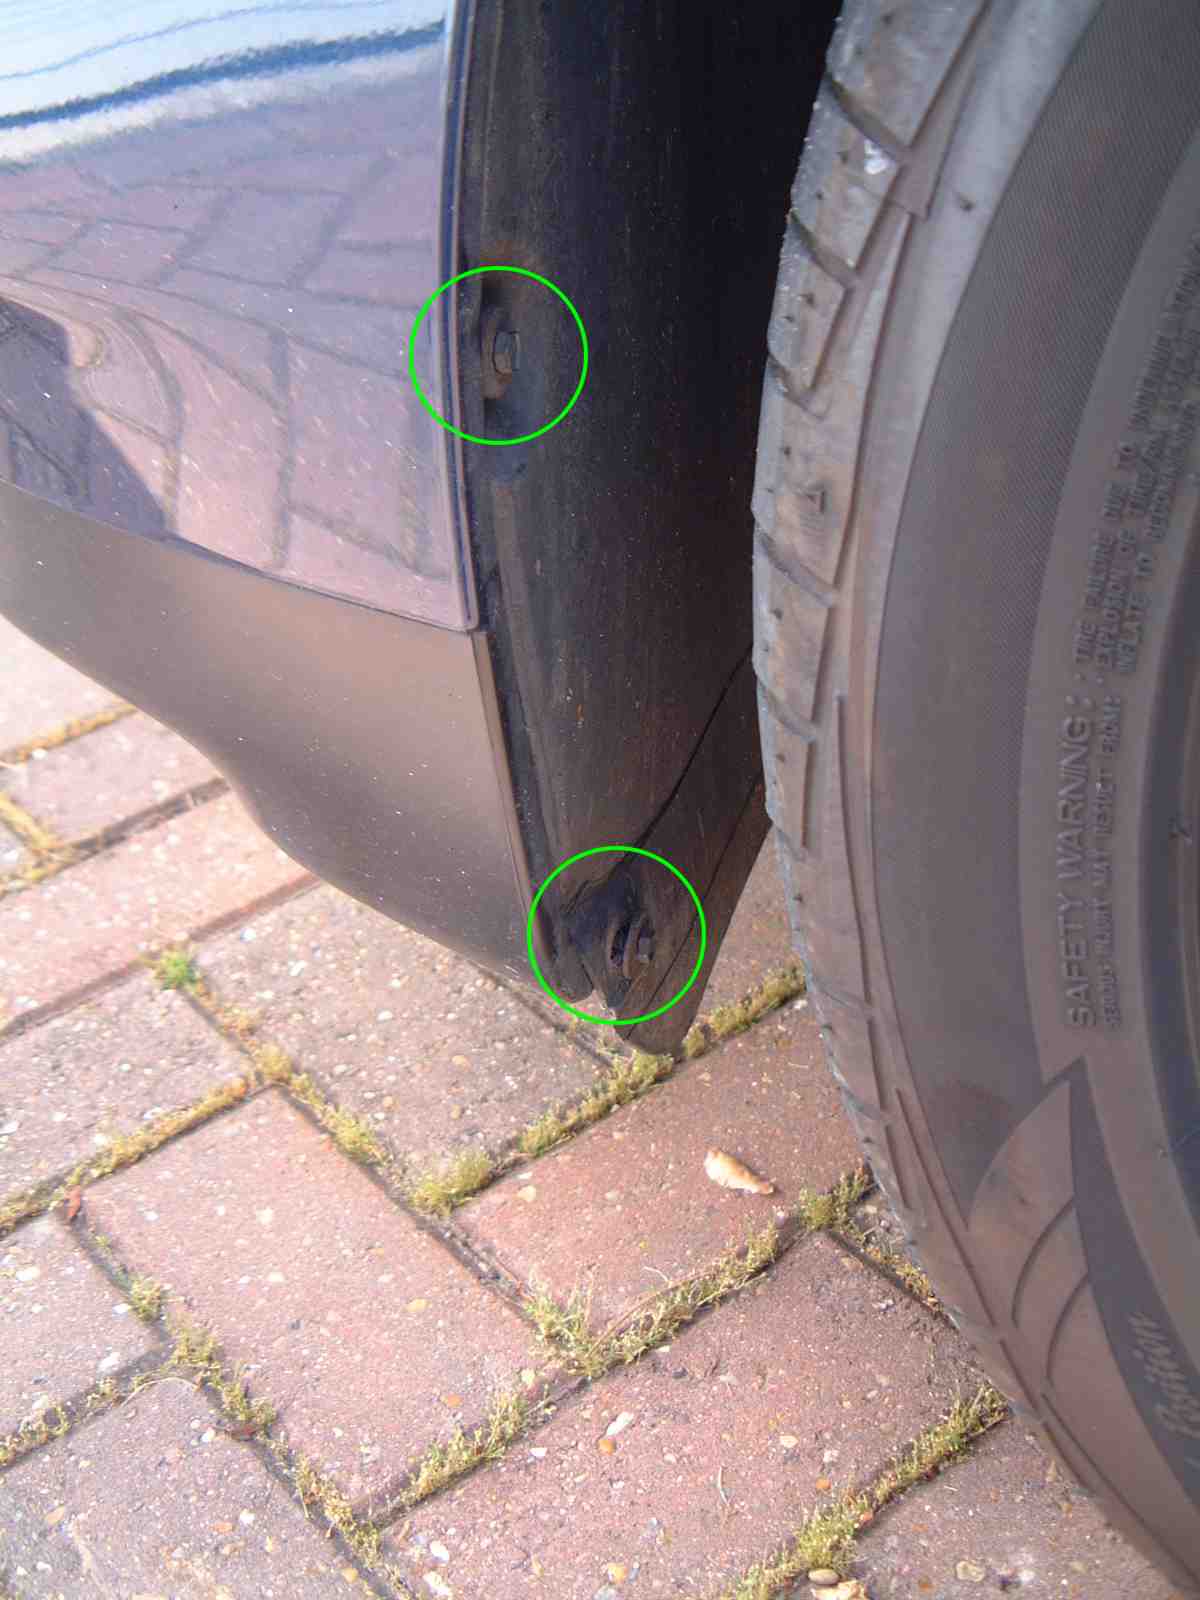
on the auxiliary fan assembly. To access the fan remove the front bumper:
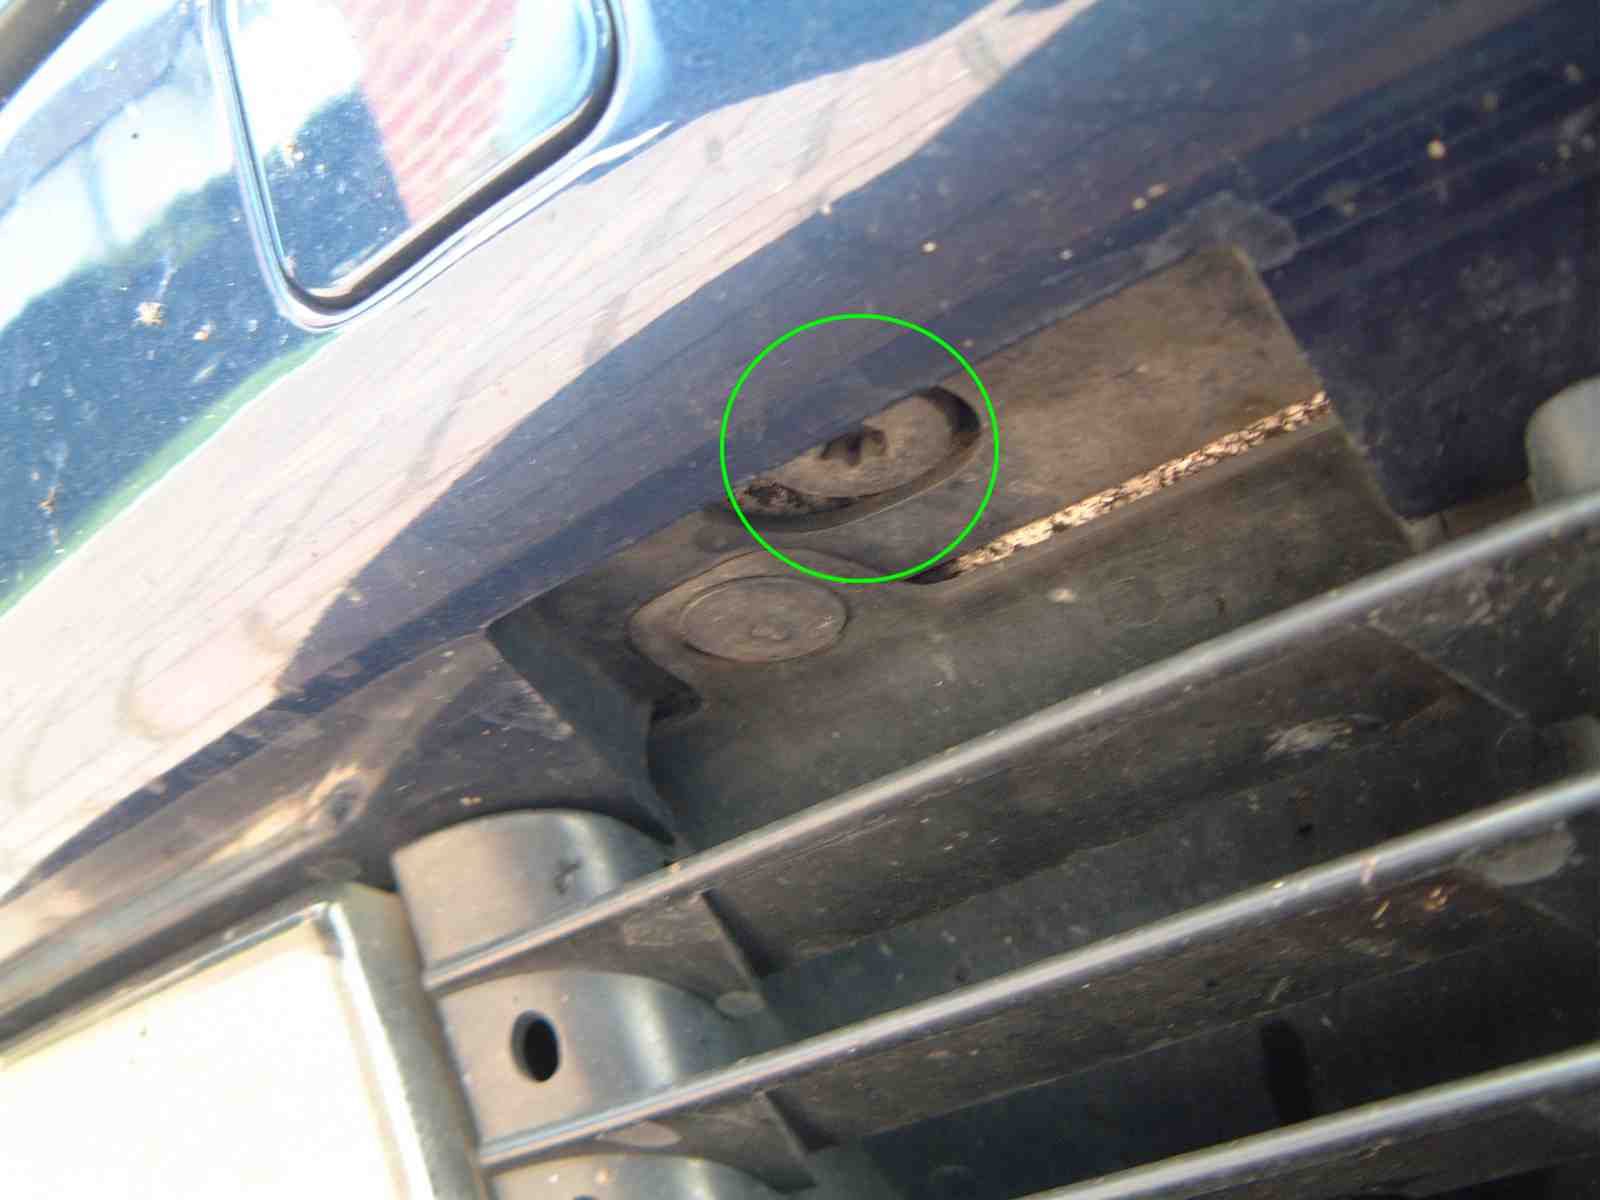
Remove the four screws (8mm skt.) from the wheel arch and
remove the two large bolts (T50 torx) from the front of the bumper.
Press up plastic lugs and pull the bumper forward by 2~4
inches. Reach behind the bumper and disconnect fog lamps and park distance
control sensors. You may also have to disconnect the headlight cleaning system,
if installed. Now you can pull the bumper further forward and remove it completely.
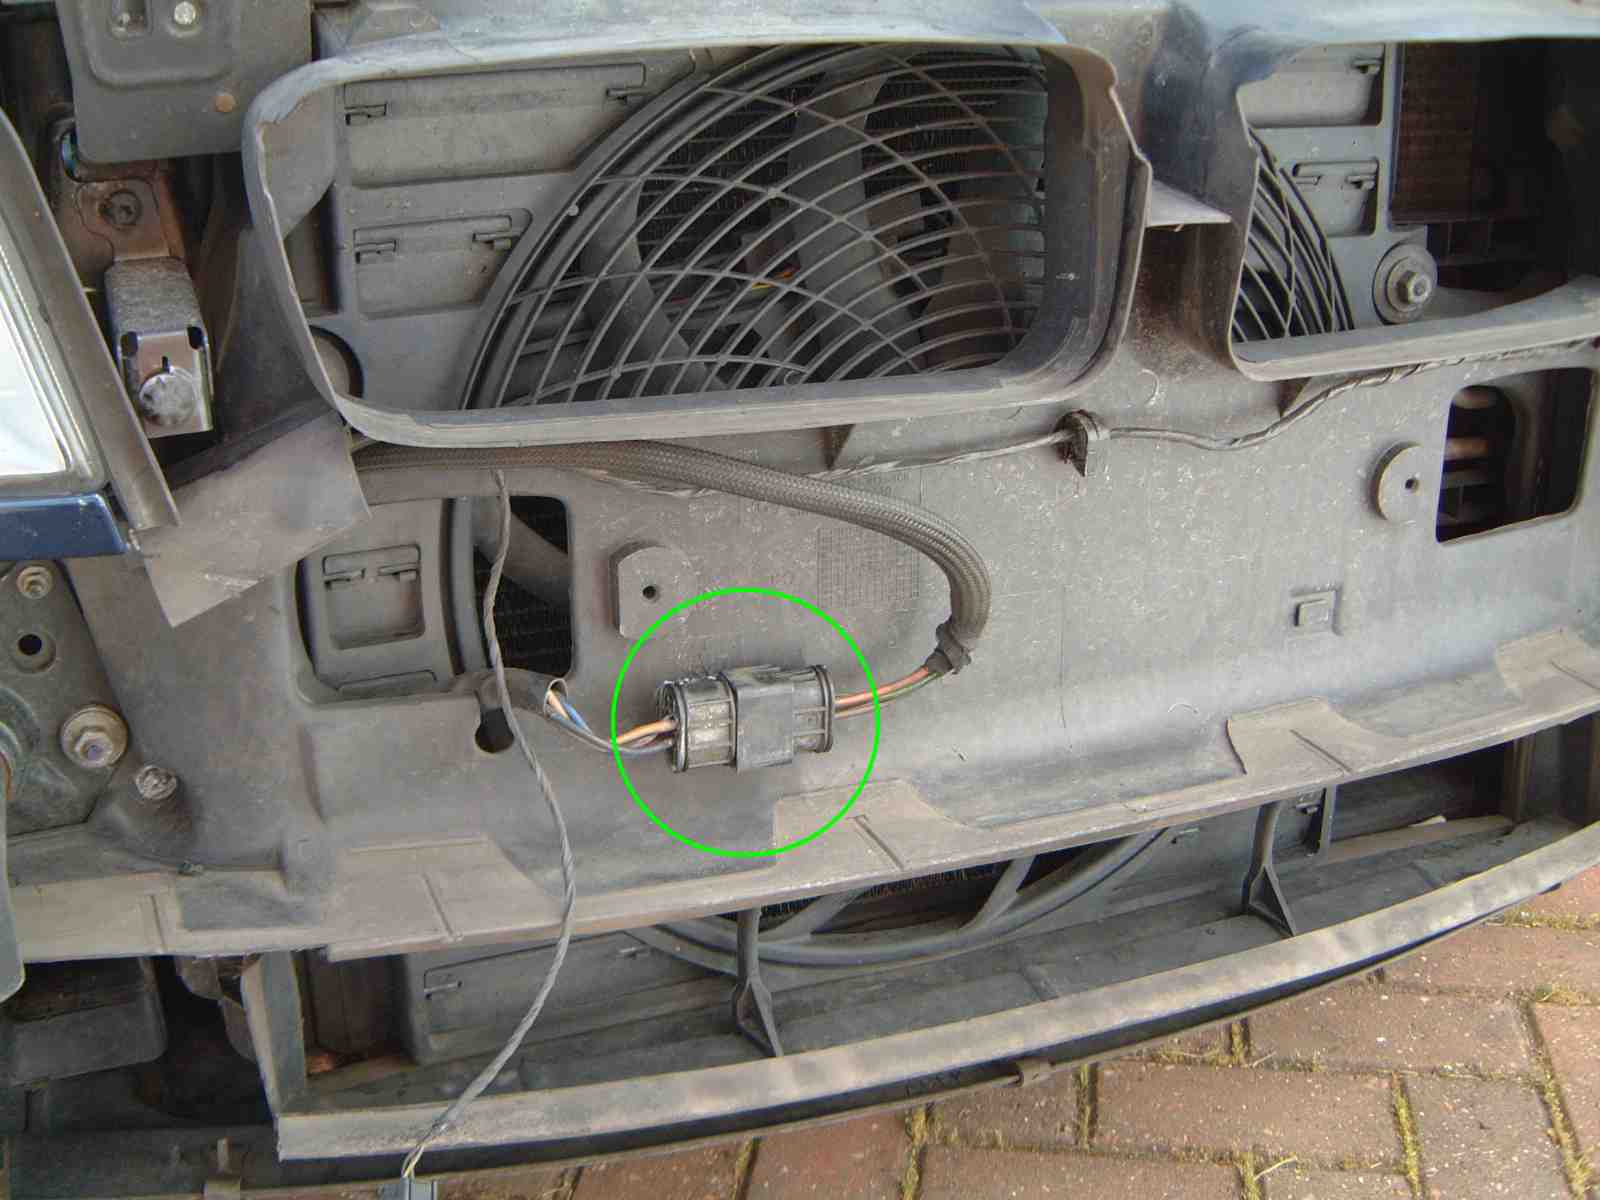
Detach connector from air duct by twisting it counter clockwise
and then pulling it forward.
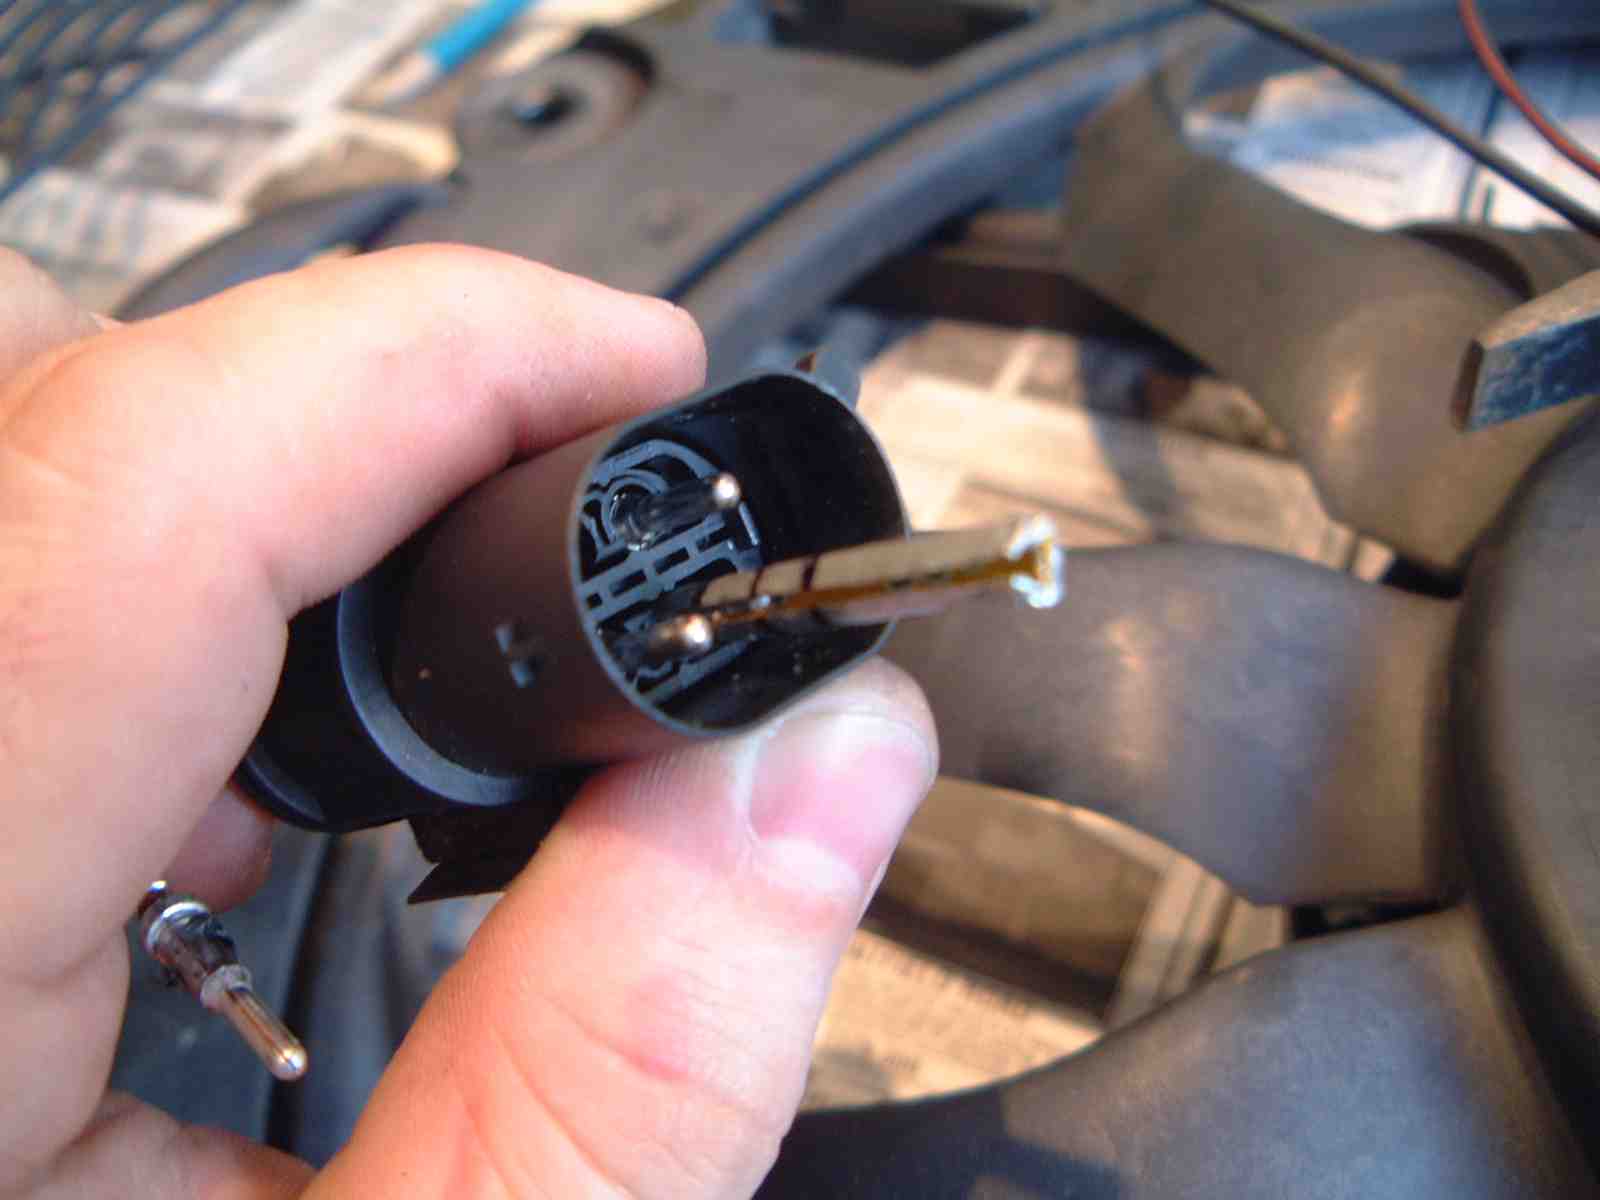
Unplug the connector and test the fan. The resistance between
brown (1) and black/blue (4) should be ~0.3 Ohm; between brown (1) and black/red
(3) ~0.5 Ohm; and between brown (1) and black (2) ~1 Ohm. If the two higher
values are way off, in particular open circuit, then the resistors are probably
faulty. You can also test the fan by connecting brown (1) to ground (-12V)
and, one at a time, the other three to +12V.
If the resistors are bad, get 1x 0.2 Ohm 80 W Siemens Dale
353-003-01 and 1x 0.5 Ohm 85 W Siemens Dale 353-004-01, or get the BMW Aux.
fan resistor repair kit P/N 67 32 8 371 873.
Once you established that the resistors are the culprits
and got the spares, proceed as follows (I used the BMW kit - if you use separate
resistors, you will have to cut and solder at different places, and will
not have to take the plug apart):
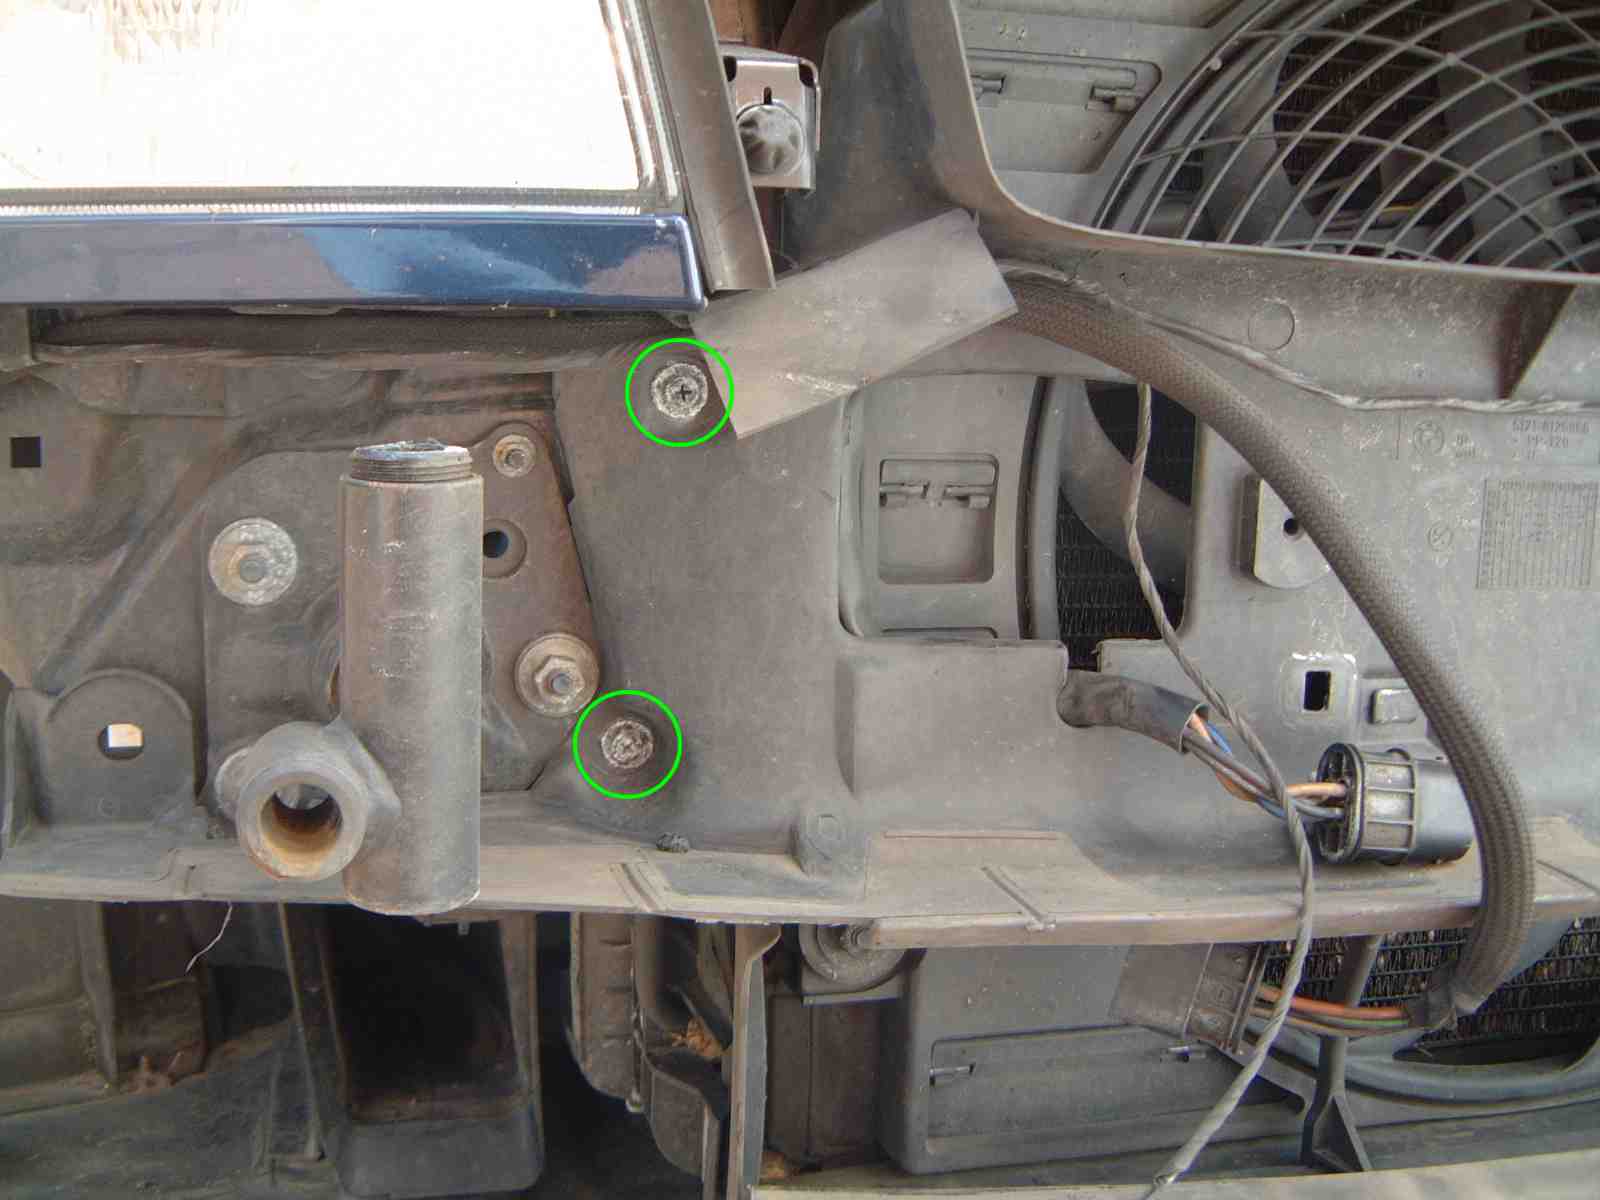
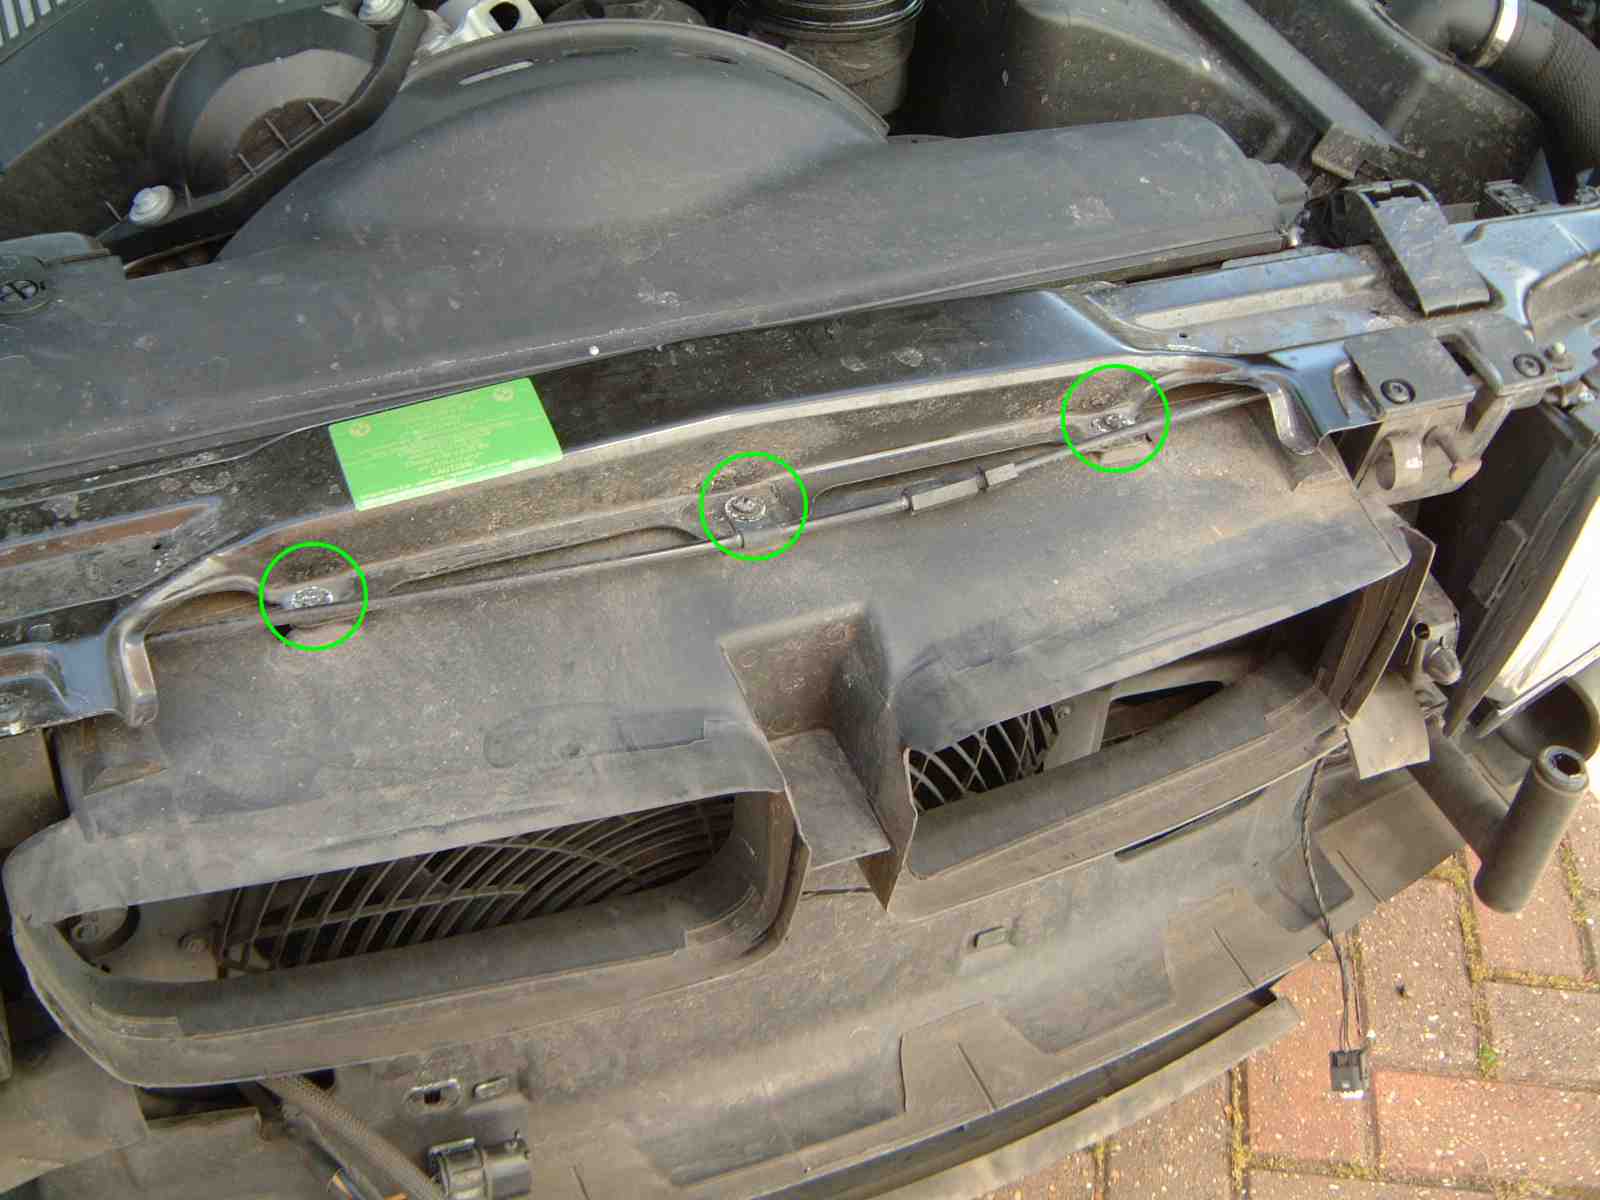
Undo the seven screws holding the air duct. Take out the
cable running across the front of the duct from the fixtures. Remove the
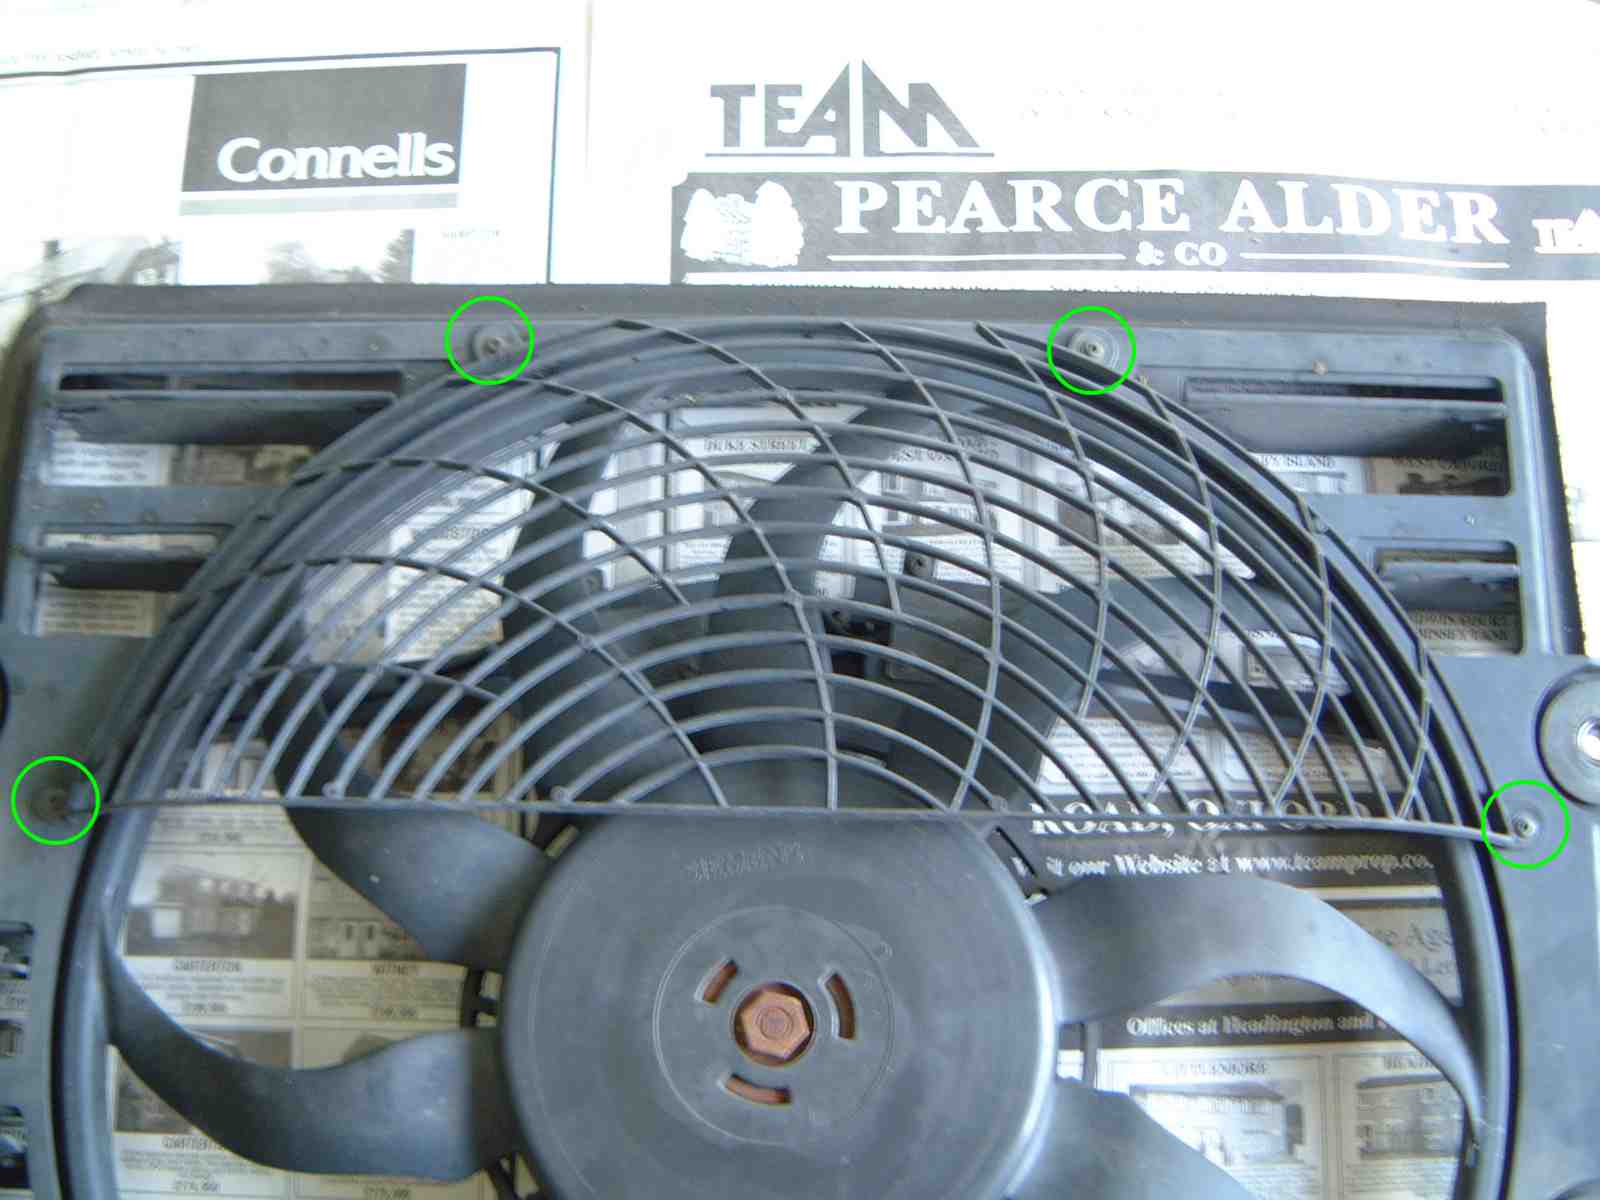
duct. Release the four nuts holding the fan cowl and remove fan with cowl.
Remove four torx screws and take off grille.

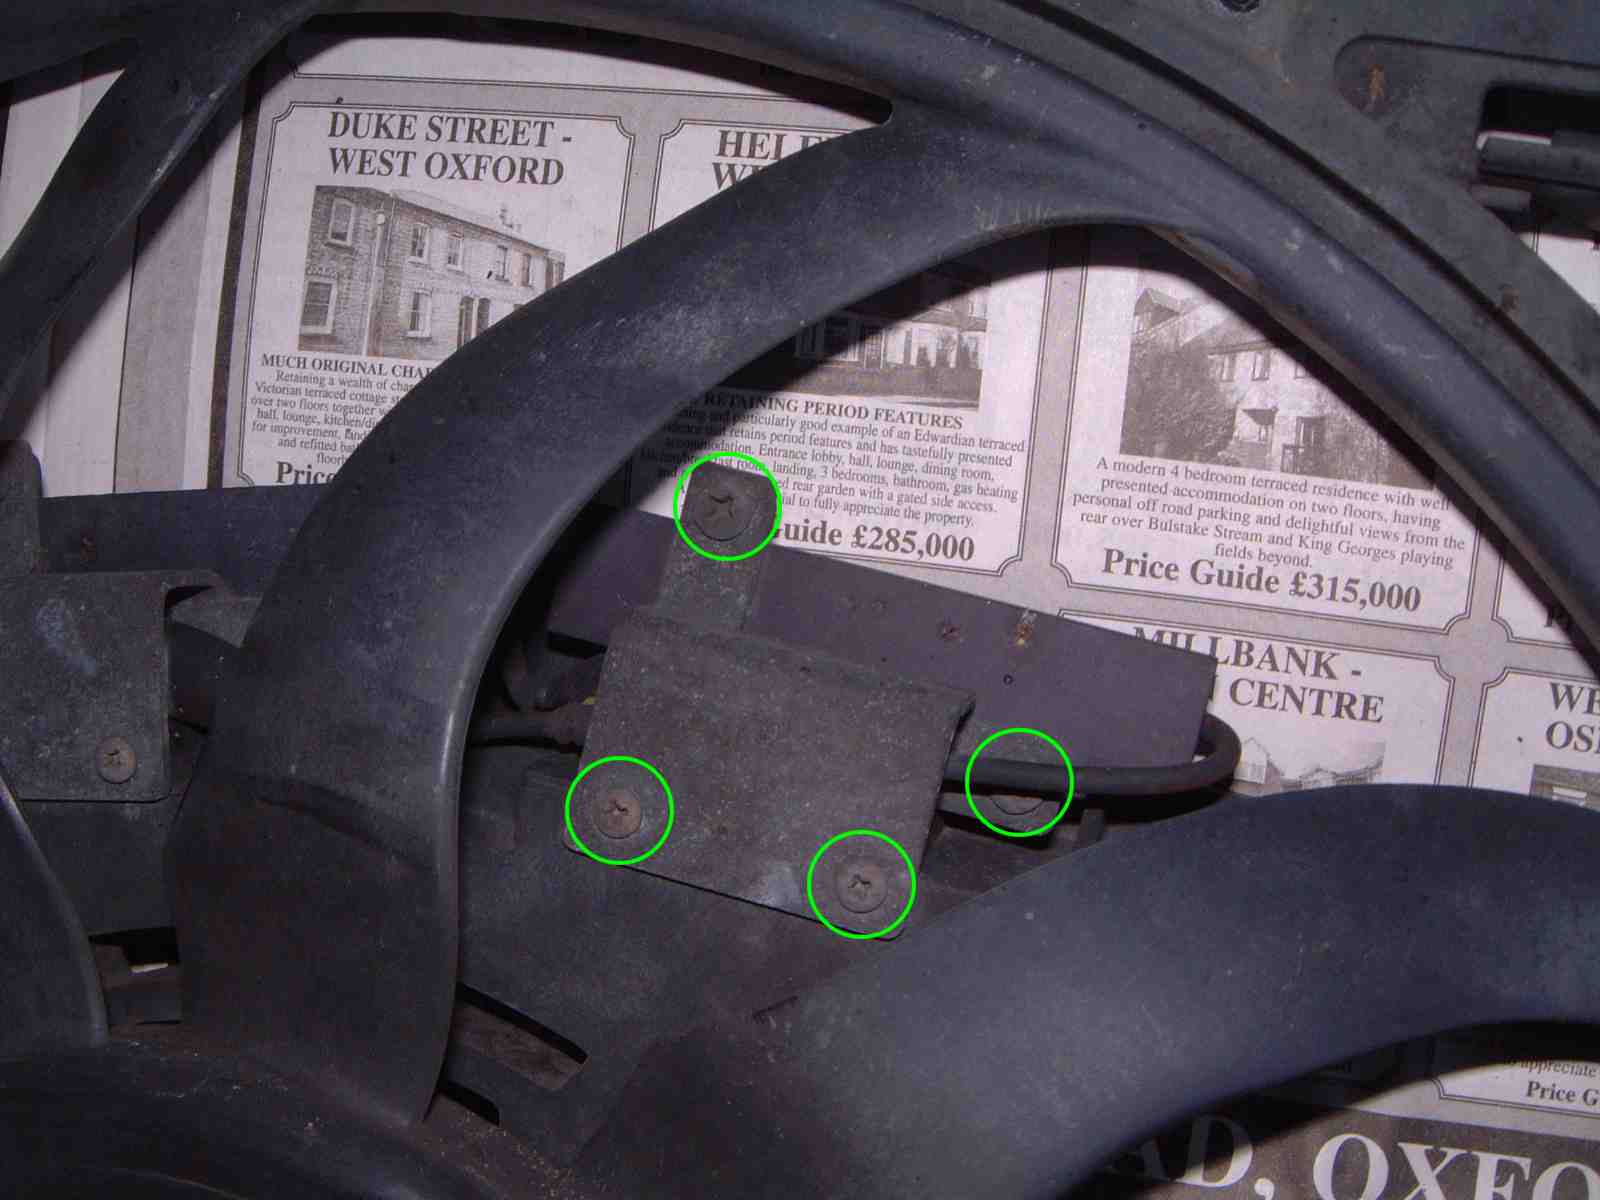
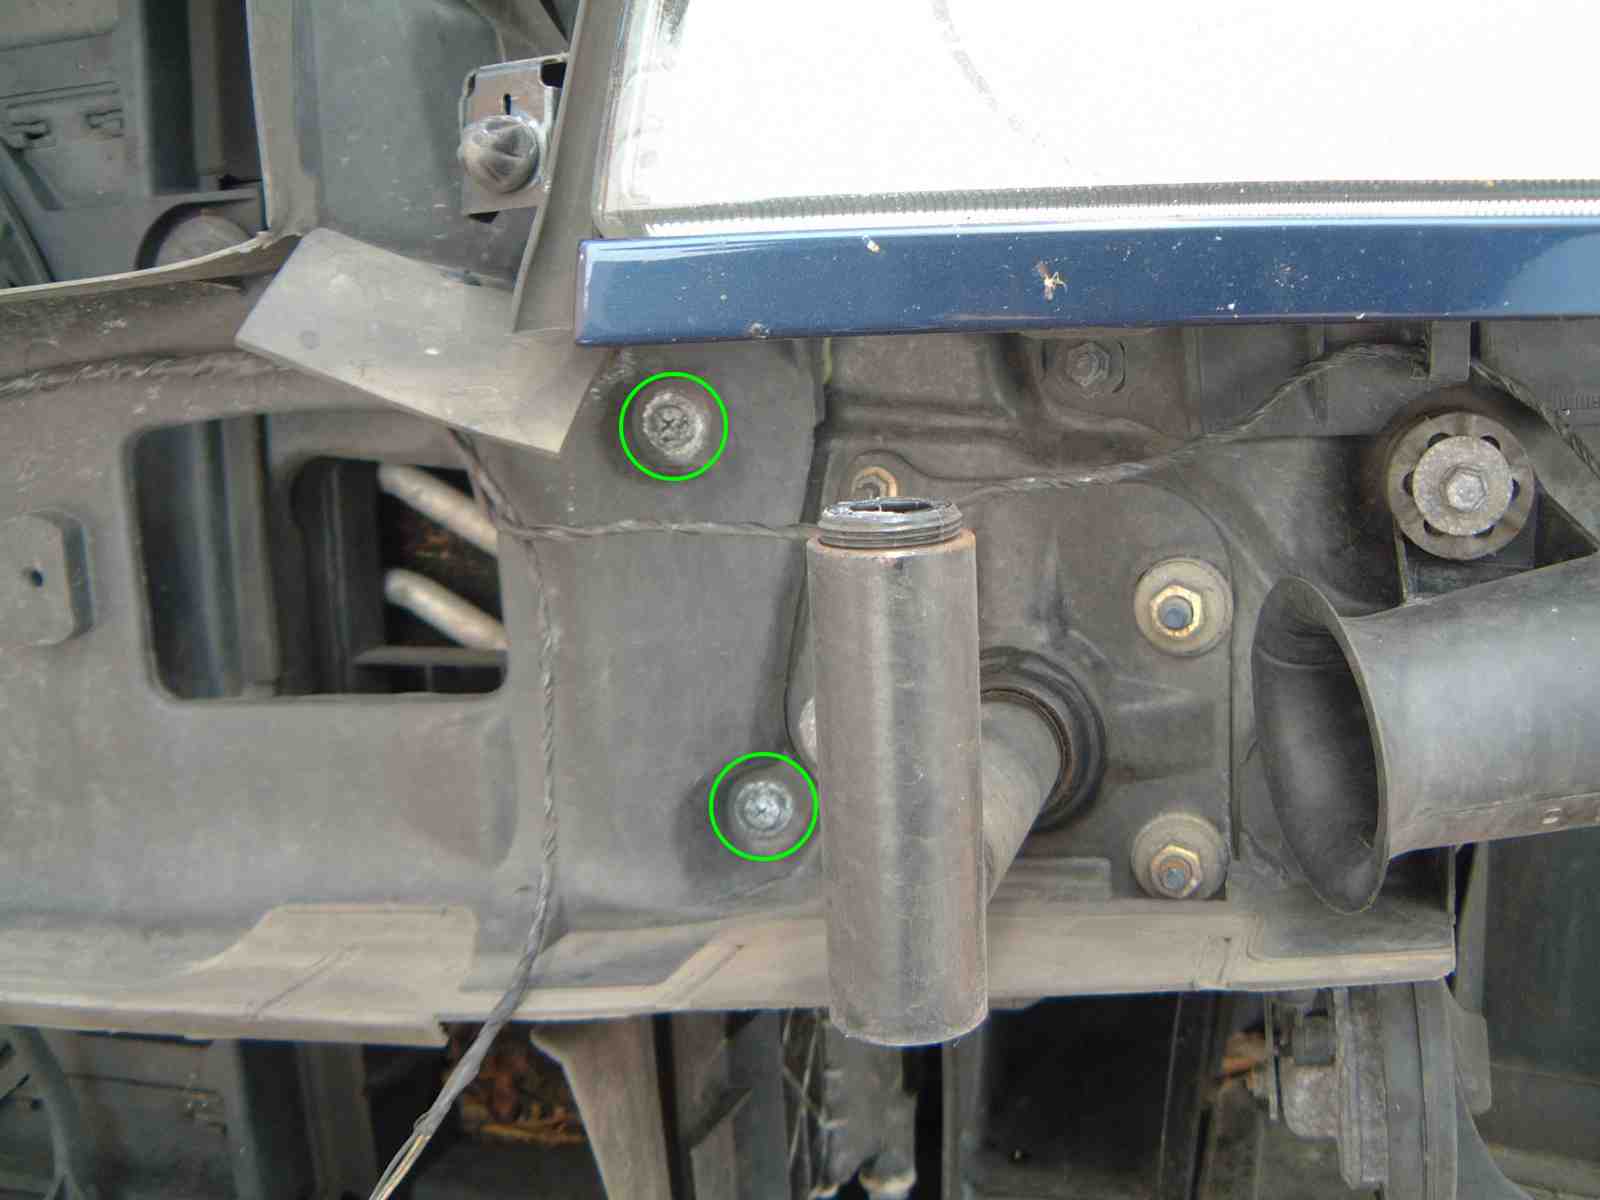
Remove eight screws from brackets holding the resistors
(N.B. two diffrent screw sizes).
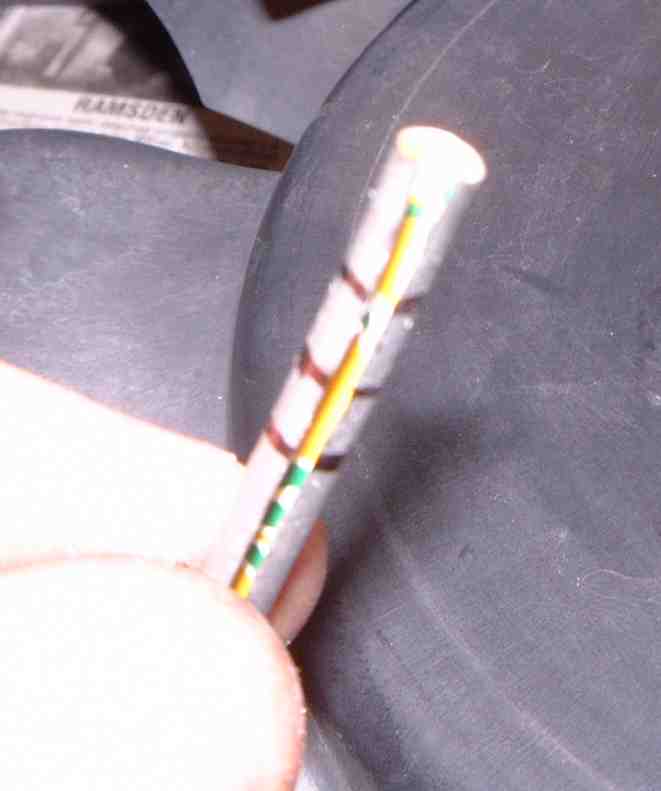
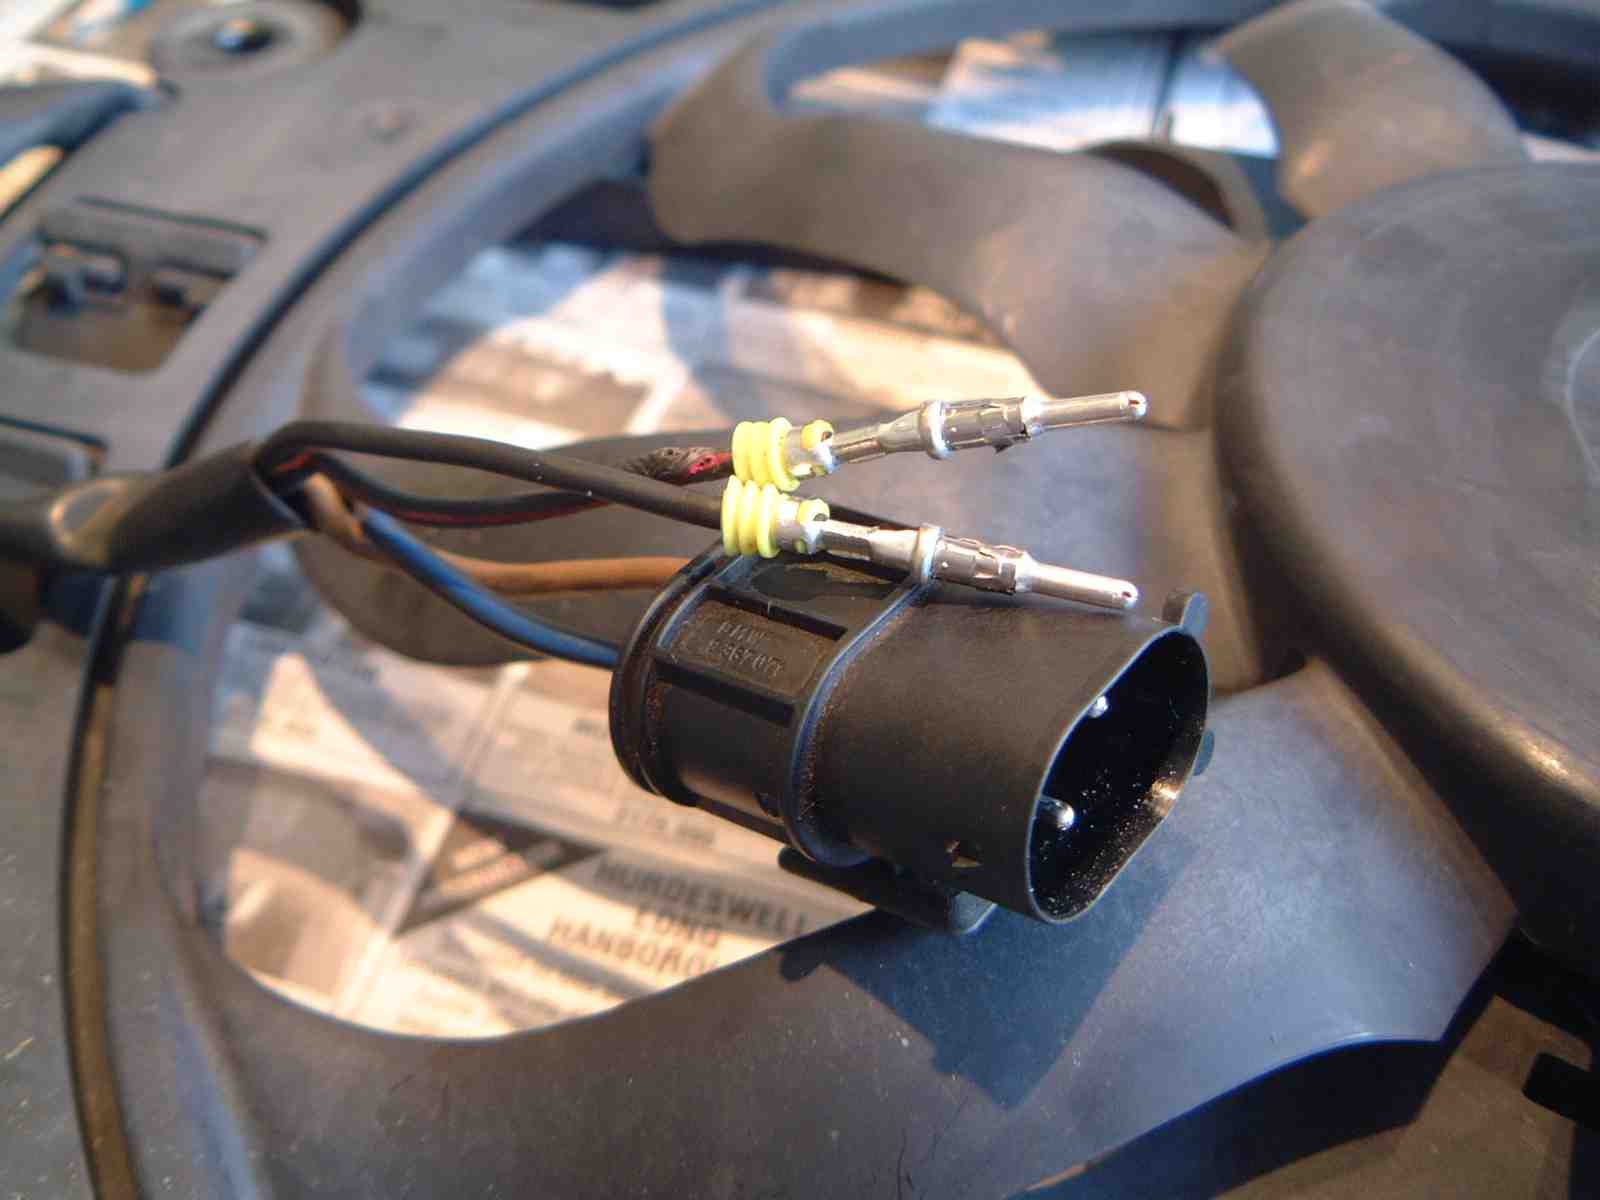
Unless you happen to have the BMW special tool for taking pins out of the plug, go and feed the cat. From the side of the tin cut out a square bit and make a thin-walled tube with a diameter that matches the pins. Note down which wire goes to which pin. Insert the tube around the pin you want to remove and gently tap it out from the front side of plug housing. Also see Note 1 at the bottom of this page.
Remove the insulation and cut the wires as indicated. Pull
out the old wires from the plastic tubes. Get the new resistor kit and feed
the two new wires back through the plastic tubes. Arrange the resistors the
same way as the old ones were positioned. Push the new pins back in the plug housing
making sure they are not mixed up. It helps if you put a bit of Vaseline on
the pin.

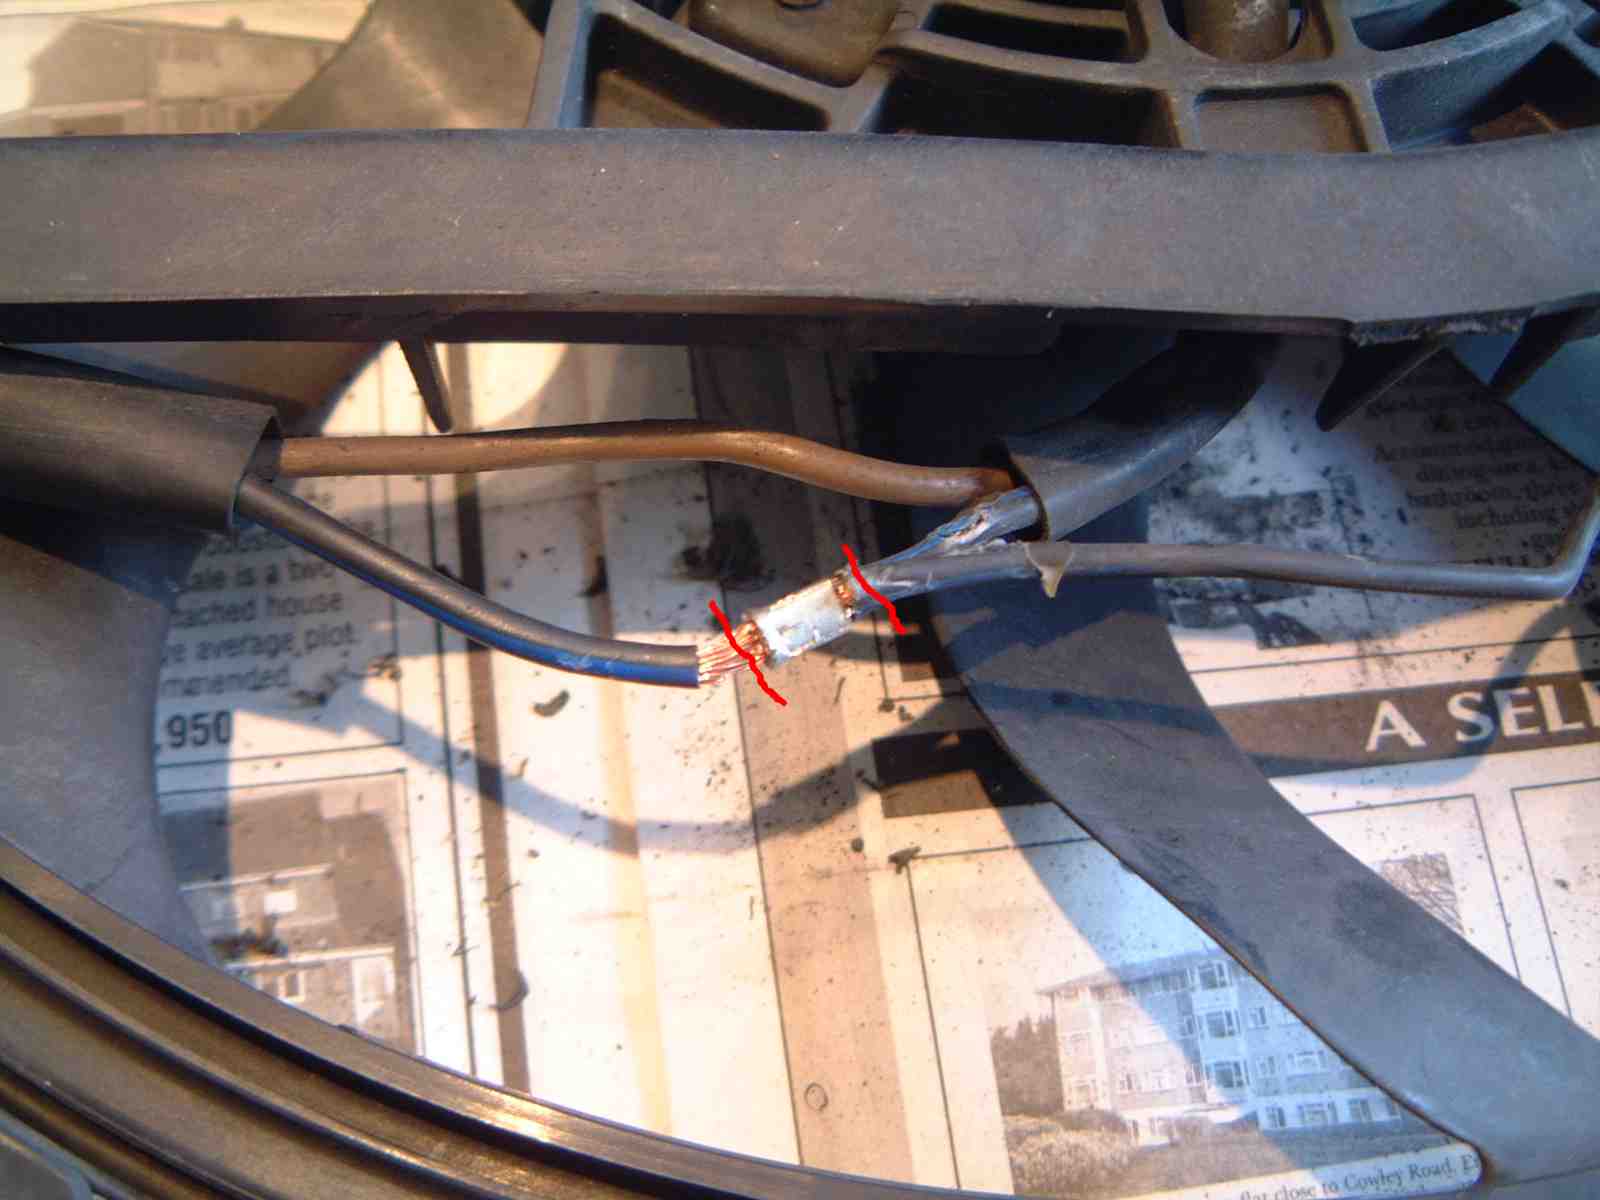
Put a piece of quality heat-shrink tubing on the thick
wire coming from the plug and solder the three loose ends together. You will
need a heavy duty soldering iron and you probably want to protect the other
wires from the heat. Make sure the heat shrink tubing will not get heated
too much while you do the soldering (as I almost managed to do). Once the
joint cooled pull the heat shrink tubing back on it and heat gently until
you get a good seal.

The finished resistor job.
Re-assemble everything in reverse order.
If you find any mistakes or want to suggest additional info
that I should include, please e-mail me.

